To create a Facebook App, go and visit: https://developers.facebook.com/apps/
Step 1:
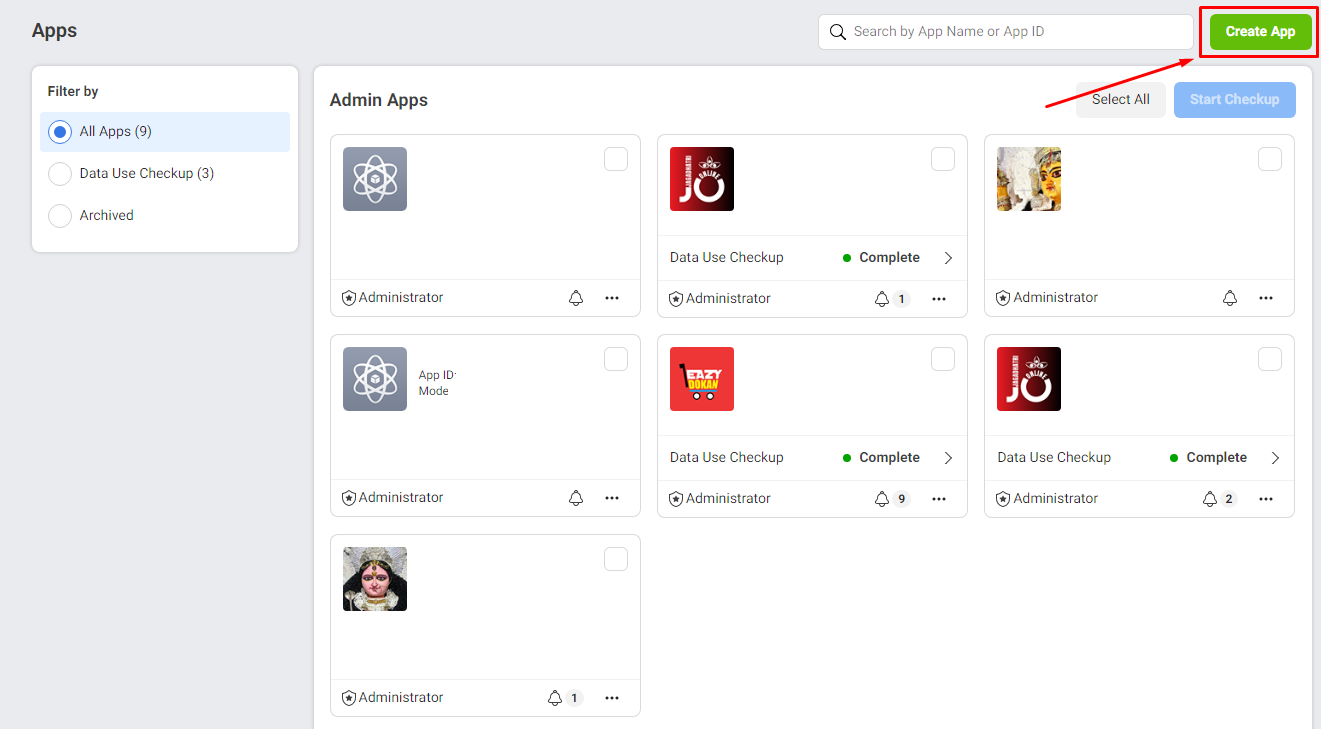
Click on the “Create App” button. A Popup will appear.
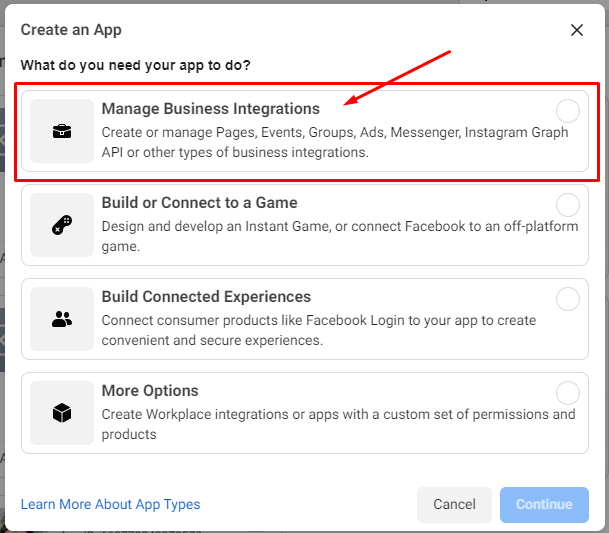
From that Popup Select “Manage Business Integrations” option and hit “Continue” button.
Note: You need to use a personal Facebook Account for creating an App. A business account won’t work. Your personal account needs to be a verified Facebook account. If your account isn’t verified yet, you’ll receive a text message from Facebook to verify your account. So make sure, that you have a mobile number set within your account, otherwise you won’t be able to create an App.
Step 2:
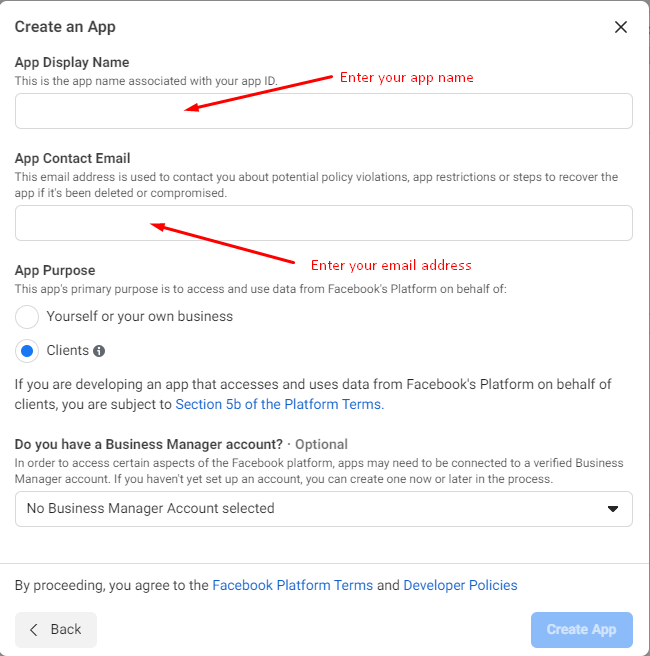
Enter the App Display Name and the contact email and click the “Create App ID”.
Step 3:
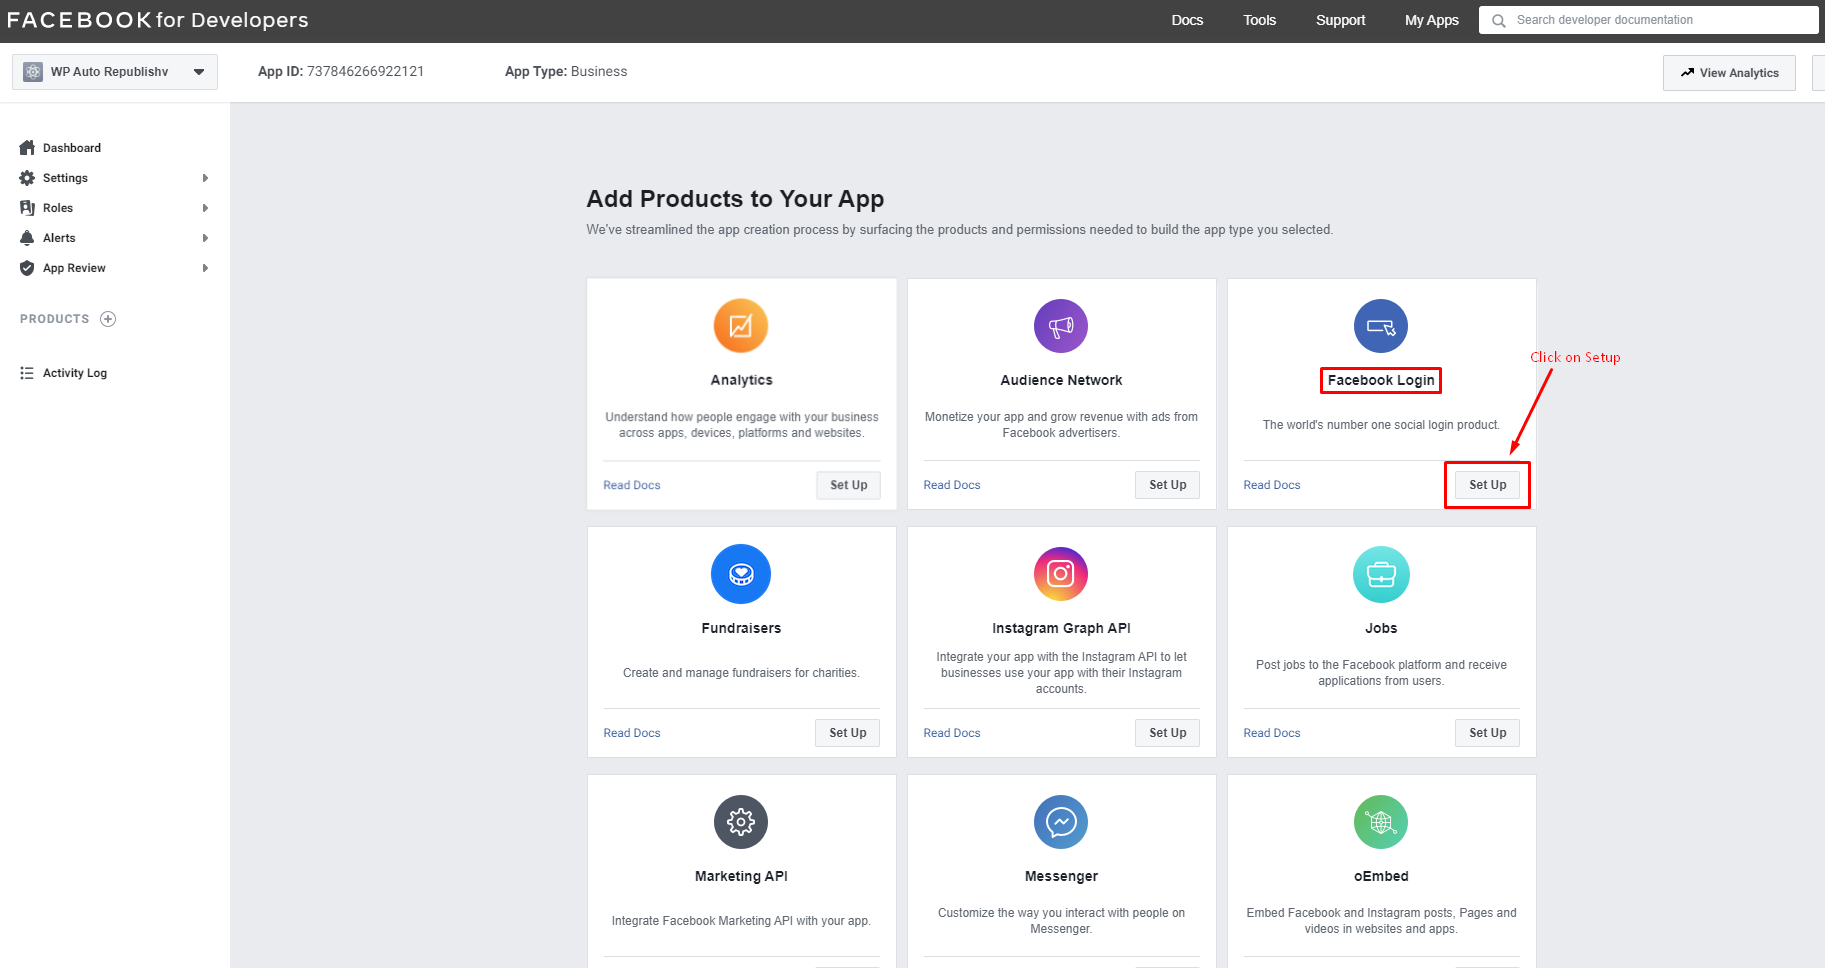
Now it will redirect to the “Add Product” page and in this page click the “Set Up” button in “Facebook Login”.
Step 4:
Click the “Web” button.
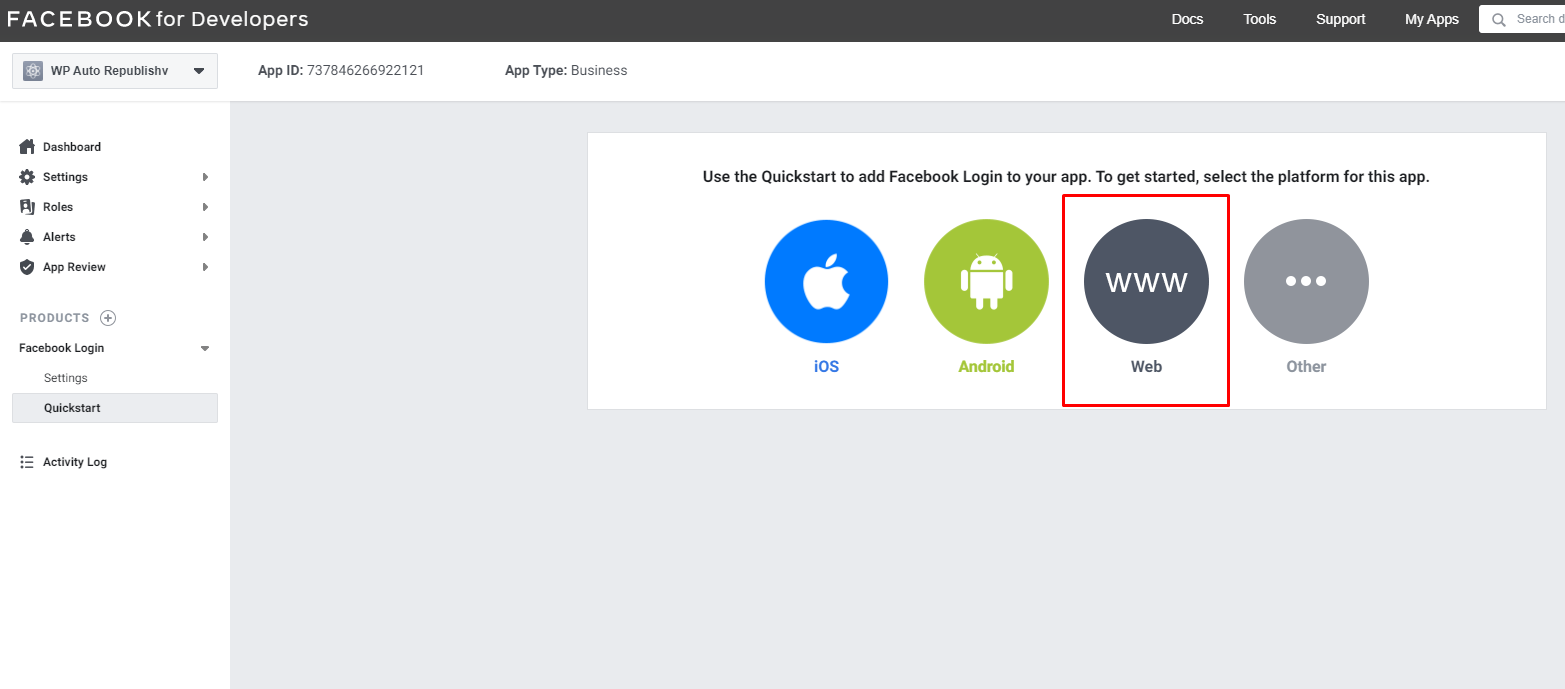
Step 5:
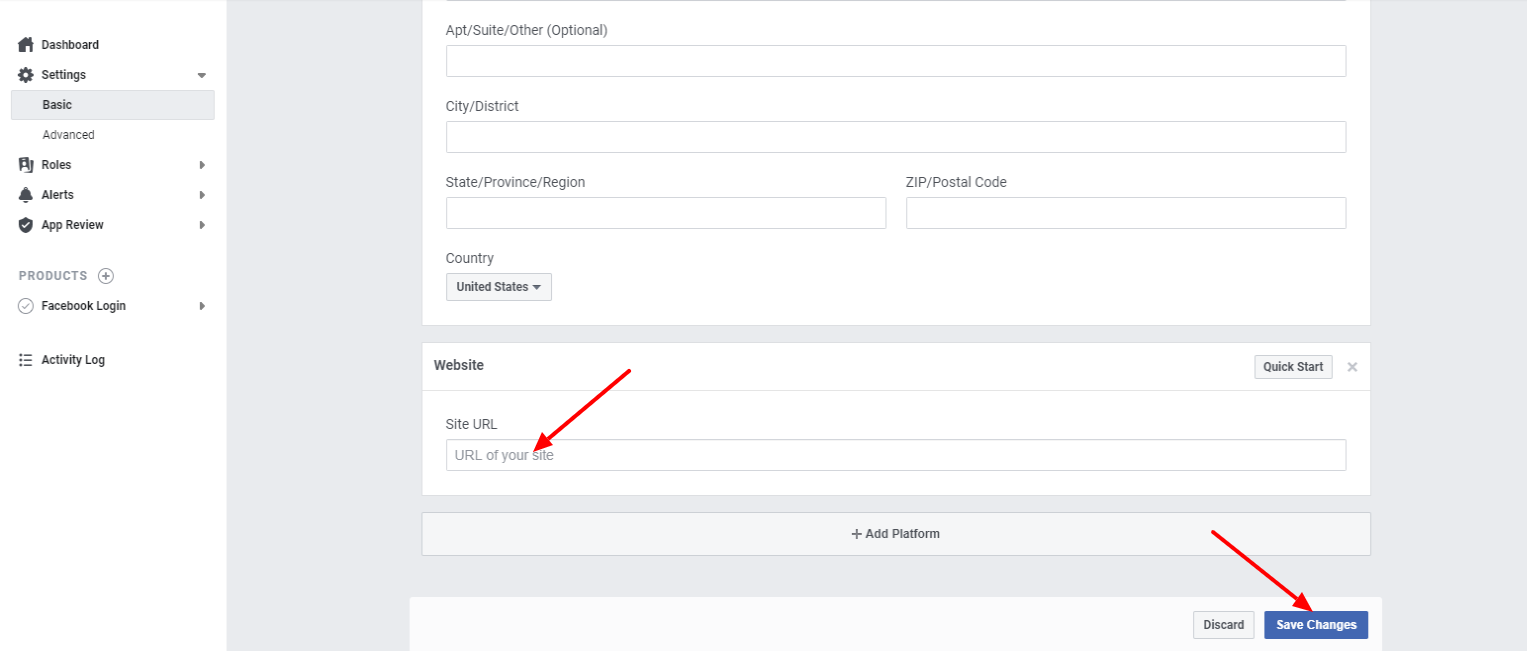
In the “Site URL” section add your Website URL and save it.
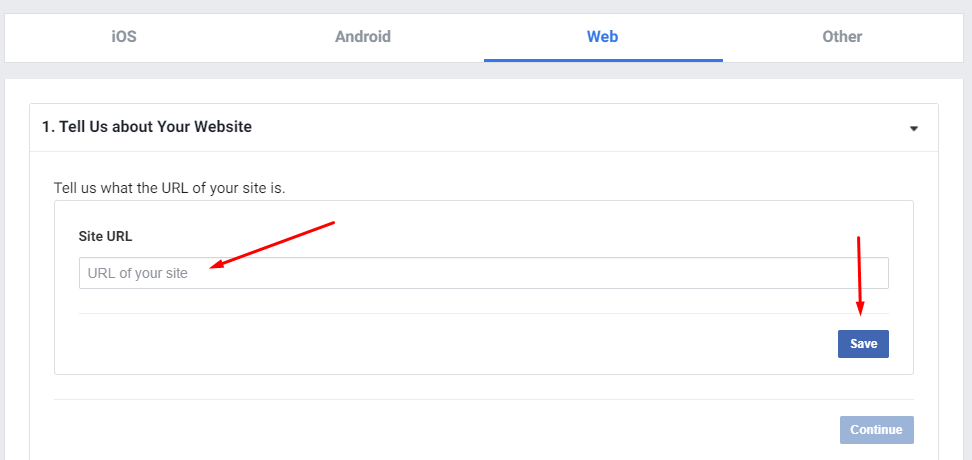
Note: If the “Quickstart” page is blank and you cannot enter the domain url, please go to “Settings > Basic” section, just below the Dashboard and then click the “Add Platform” as shown below.
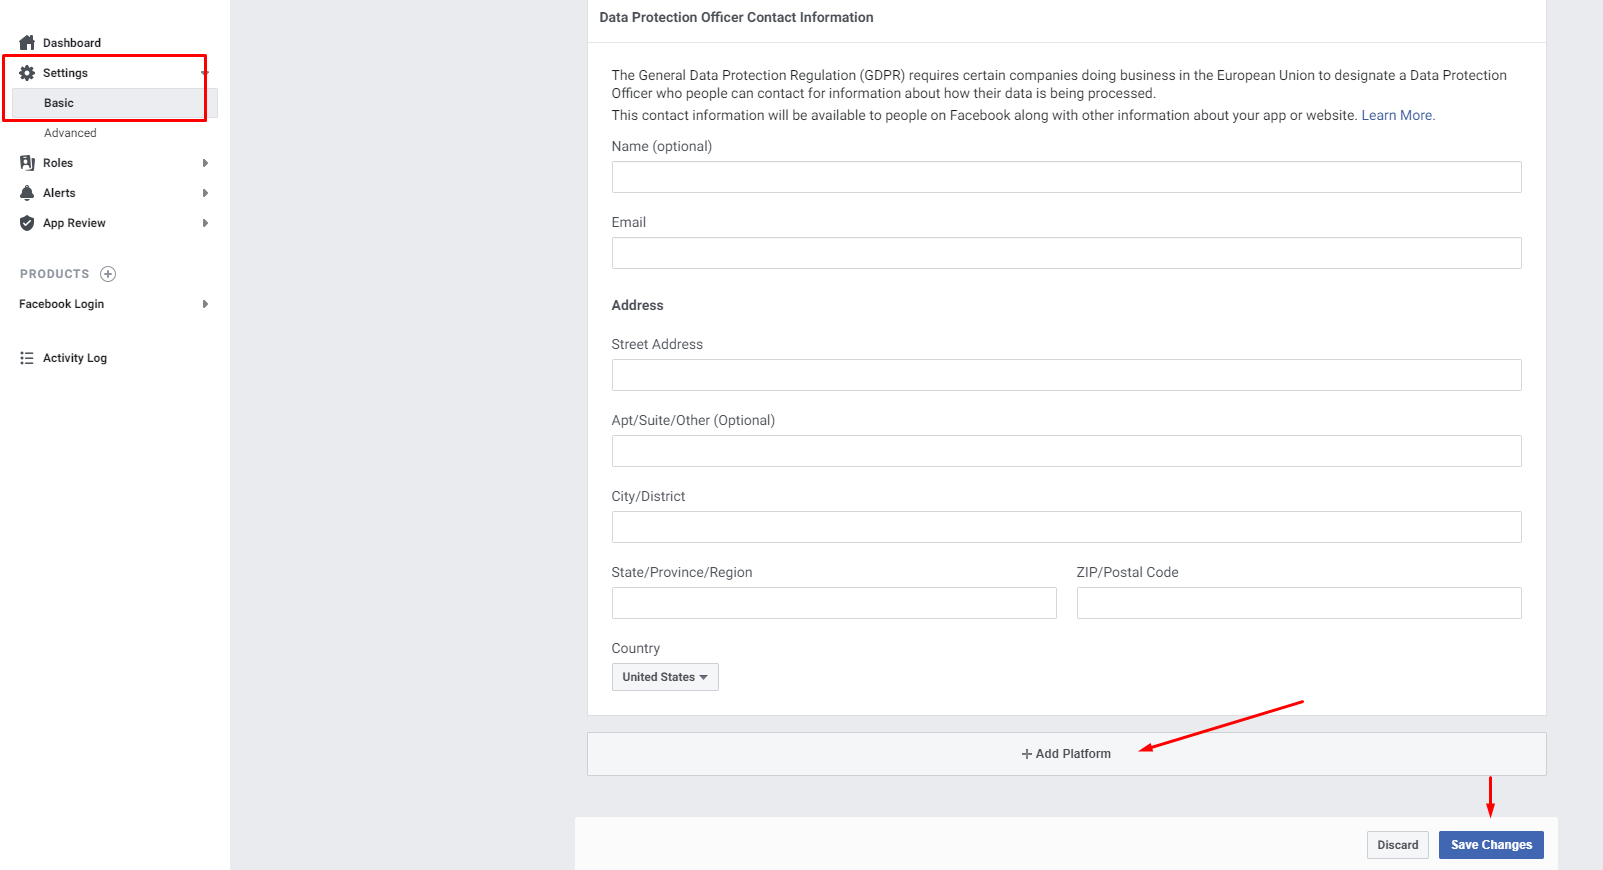
Then select the “website” as given below.
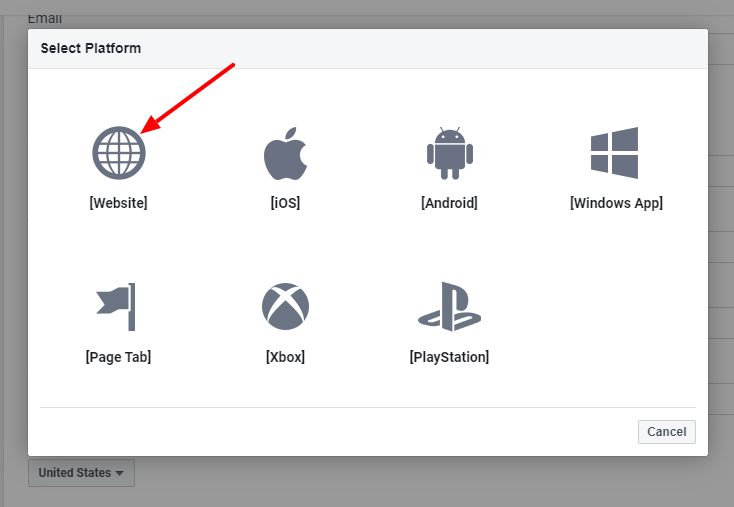
In this page you can add the Website URL and save it.
Step 6:
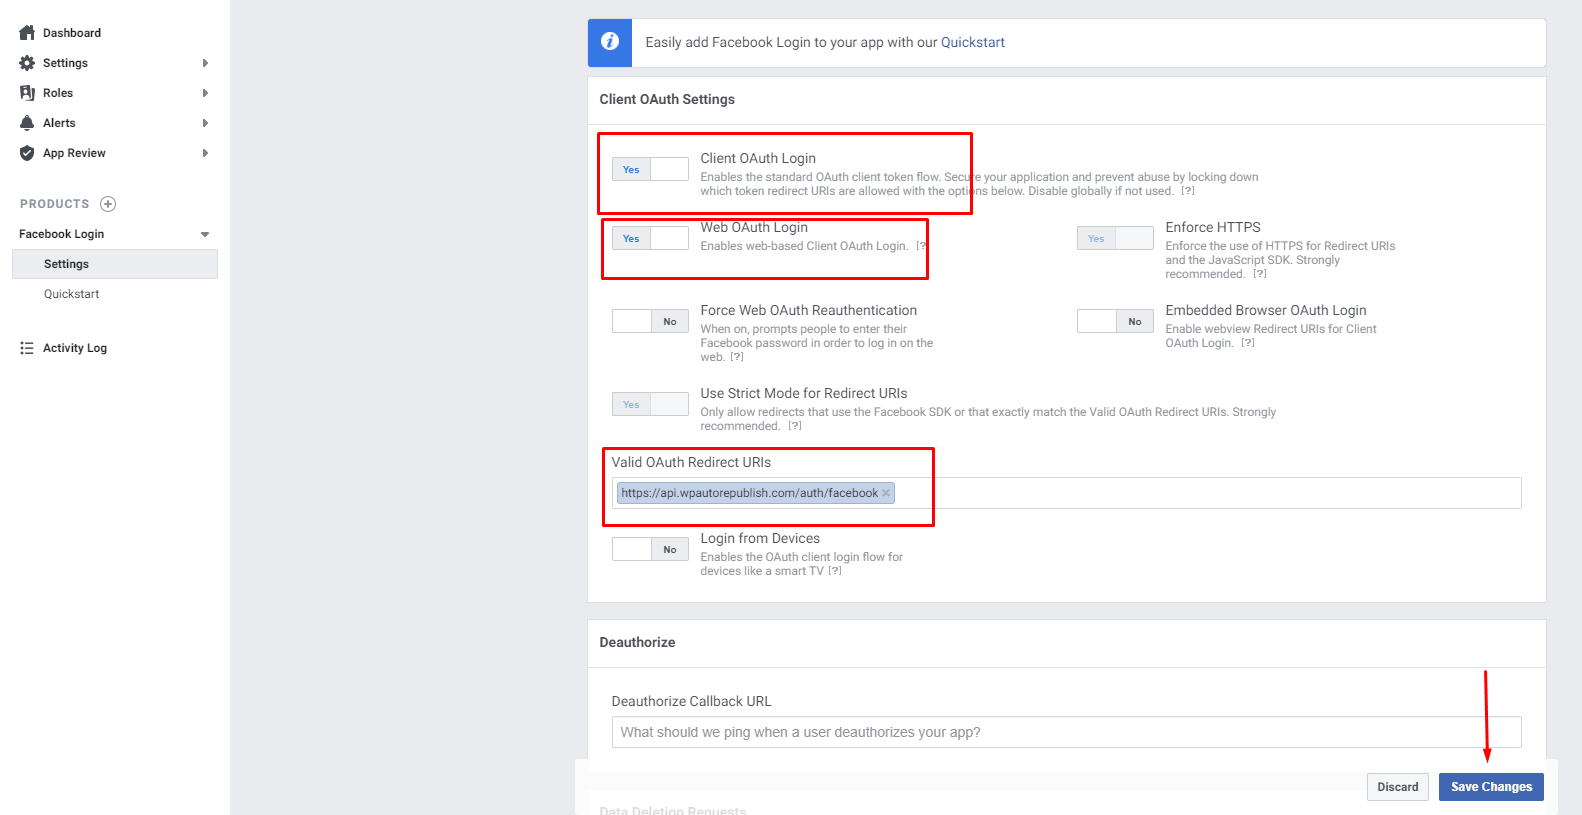
Click on the “Facebook Login > Settings” link as shown below. Here enter the “Valid OAuth redirect URIs” and save the changes.
Valid OAuth Redirect URL is https://api.wprevivepress.com/auth/facebook.
Step 7:
The app is ready now. Click the “Settings > Basic” link in the menu to see the app id and secret.

Step 8:
Here the app is in development mode. Only the developer can view the posts now.
We need to “submit the app for approval” and after the app get approved, we can make the app public and the users can see the posts in the Facebook.
The App Review Process Submission is given below.
- First of all, individual OR business verification is necessary to get app approval. As you are an end user of the plugin, you have to do individual verification for the app. Simple steps you can find here.
- Once individual verification is done, you will receive a verified badge like the screenshot below:

- Go to “App Review > Permission and Features” menu.
- Find ( pages_show_list, publish_to_groups, pages_read_engagement, pages_manage_posts ) permissions and click the “Request” button in front of each one.
- Click the “Continue the Request” button. Fill the form for each permission, and send your App to review. You need to wait up to 5 days. A random Facebook worker will review it. If that worker does not have knowledge about plugins or WordPress, he does not review your request properly and declines it. Please try to re-submit the same request again. Eventually, your request will be accepted.
Step 9:
- After reviewing Facebook, they will ask to enter the business details. (At the time of app submission this option is not available. We can see this after the review of Facebook)
- Once the app gets approved, you can see the permissions approved with a green bubble under the “Approved Items”.
- Now make the app “Live”
- To make the app ‘Live/Public’, please go to the ‘App Review‘ page.
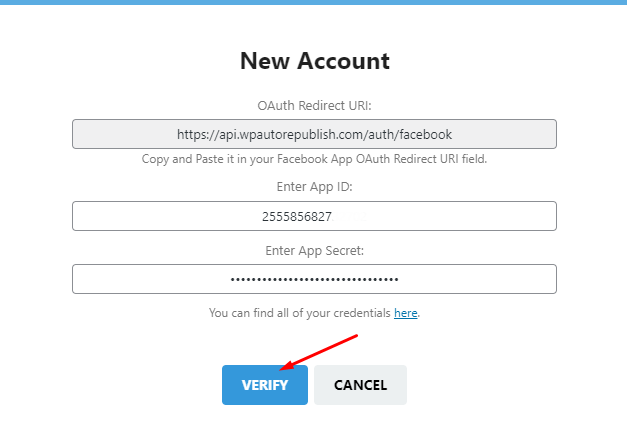
You can now use the Facebook app keys in the plugin. Now enter these keys in the plugin settings in your site. After entering the keys in the Facebook popup dialog box, you need to “Authorize” the account. You can see the FB pages in the settings page only after authorizing FB account. When you click on the “Verify” button, it will redirect to a Facebook popup dialog box.
Step 10:
- There are some warnings and you can ignore the warning and click the “OK” button.
- Select the “Public” option and click OK.
- Then click OK and the authorization is complete.
- Now you can see all your Facebook pages and you can select the Facebook Pages page to auto republish.
- All Facebook Pages and Groups will be automatically added and activated. If you want to disable share on some pages or group, just disable that account.
Note: If you are doing group posting, you have to add your Facebook app within that group on which you are posting. Follow the steps mentioned in the link here.
Did not find a solution? We are here to help you succeed. Open a support ticket.


